Thursday, April 4, 2013

Rear Wiper Arm

The rear wiper arm is either a work of art or the creation of a mad man depending on how you view it. There's no doubt it's over complicated and prone to fatigue given the stress on the shoulder.

Mine eventually went snap after 16 years and so I bent over and took it from Porsche to the tune of £140 for a new one....

Here's where it snapped (where they all snap eventually)


Removal and refitting is pretty straight forward.

After removing the cap over the retaining bolt, a 13mm socket will undo the (slightly rusted on my car) nut.


This will then allow you to prise off the small rubber surround to reveal the larger nut holding the arm in place against the motor.


I used an adjustable wrench on this one, so no idea what size it is.
Once this is undone, the assembly can be removed from the motor arm. This wasn't as easy as I thought it was going to be and took significant upward pressure. I had to be careful not to lever it out against the glass for fear of cracking it. Fortunately there is a groove on one side that allowed me to get one side of some needle nosed pliers in, and I was able to pop the assembly out of the screen. This will make more sense if you ever do this job...


So you're left with this (above) - an opportunity to clean and grease more stuff.

Reassembly is (obviously) the reverse and took no time at all. The wiper now sits in a more appropriate place - much further towards the edge of the rear screen. Not sure if that's because the design has changed slightly, or whether over time, the arm flexes in such a way as to allow the wiper arm to sit further in towards the middle of the screen.


Wednesday, February 27, 2013

Paint

I had a chips away man come to repair a small scuff on the rear bumper (thanks to whoever it was in Waitrose car park that left me this gift....)

He was a real pro - the job is excellent...


For those that have ever wondered what goes into L744 Paint (I bet there aren't many out there who have...)


Whod've thought it....

Thursday, January 10, 2013

Foam Sound Insulation

The car has foam pading underneath the mats in the front footwells. It's a dense foam that holds an extraordinary amount of water when they get wet. It's always important to check underneath the foam - not just the mats - for signs of water ingress.

My car had suffered from a water leak earlier in its life which had been traced to a line of factory sealant that was allowing a small amount of rain water through and down into the footwell.

I had the whole thing repaired and the floor bolts rust treasted etc.
However, I didn't buy new new foam. The existing was allowed to dry and then replaced, however I was never particularly happy with it. It was flatter than it should've been.

Eventually got round to buying a new piece to fit and took the old one out. Very easy job.

The floor pan is interesting to inspect. Again, the sealant looks to have been applied liberally and haphazardly..


The new foam part has a 964 part number, so I expect this part of the floor pan is identical to the 964. It has ribs and grooves that allow it to fit snugly into the foot well.


The foam has to be slid in underneath the carpet ends. It's a tight fit and the foam rises fairly high up the footwell - almost touching the bottom of the dash.


I used a 3M impact adhesive to glue the carpet to the top of the foam - which has a smooth, rubberized surface.

The overcarpet fits on top - secured by metal brackets. Then the Porsche overmat on top.
Although it's an easy job, I'll be very pissed off if I have to do it again. I hate a wet car.


Unrelated to the foam, but just for the sake of it, this is how I get two (young) kids in the back of the 993 with boosters.


And finally, after I did the foam, I spent a bit of time with the polish. Got a nice reflection of the houses in a very flat light...


Wednesday, December 19, 2012

HID Lights


I like to use my 993 throughout the winter months, however the standard headlights are not very good and fail to light the road ahead effectively. Generally speaking, I do not like to make alterations to the car that cannot be totally reversed and as such I’ve always avoided going down the HID (High Intensity Discharge) route for the headlights.

Although they provide much more effective illumination, up to now the kits for installing the HID’s have included a ballast resistor that required drilling through the headlight unit. This never appealed to me.
Now, Tore B has produced a kit that fits entirely within the existing housing. As a result, returning the headlights to standard is literally as simple as replacing a bulb.

No affiliation to Tore B – I just think his kits are brilliant. Here’s a link to his web site FYI


Because I have the turbo ‘s’ front ducts, the LED lights included in the kit do not fit. I have ordered some 39mm festoon LED bulbs which I will install.

This is how the kit arrives. Nicely packaged.


Here’s how it installs.

1.      Remove headlight assembly and unclip back to allow access to the bulb clip.
2.      Remove existing bulb and replace with HID bulb
3.      Screw ballast to existing mounting holes on inside of back cover
4.      Plug light in
5.      Replace cover and re install in car

Makes a huge difference, although hard to photograph in light conditions.


Existing Lights are dim and yellow


Removing parts gives an OCDer a great opportunity to polish...


39mm festoon bulbs in the 'S' ducts will be replaced by LED's They are so yellow compared to the new HID's


Nice bright white light for driving at night....

Friday, August 17, 2012

History


History:

Car delivered new in 1997 by Isaac Agnew in Belfast. Isaac Agnew is the only Official Porsche Centre in N Ireland I believe.

Car then bought back by Isaac Agnew who carried out a service and sold the car to another Irishman – I have spoken to him and have his contact details. He sent me the original Isaac Agnew advert which I’ve posted on the blog.

Car then sold to Mr C in Isle of Mann. I spoke to him before I bought the car and still have his contact details

Car came onto British Mainland and bought by Mr R. in Cheshire and car was looked after by Tony Greatorex.

I bought car in April 2010 and has been maintained by Pete at Langley Autocraft.
So I am the fifth owner. The mainland V5 states that the car has had 2 previous owners, but it is incorrect. It’s often the case that the V5 is wrong on cars that have come in from Northern Ireland.


Service History - starting with most recent:

77,042 miles 3rd October 2012 - Langley Autocraft

  • Service, oil, filters
  • Front Discs (Pagid)
  • Front Pads (Pagid)
75,947 miles 18th August 2011 – Langley Autocraft:

  • Interim service including oil, filters replacement of number plate bulb
71,152 miles 31st March 2010 – Tony Greatorex:

  • Full service including replacement of lower cam covers, gaskets and bolts
63,940 miles 9th December 2008 – Tony Greatorex:

  • Full 48k service including plug change
  • Brake fluid replacement
  • New brake pad wear sensors
  • New engine cover struts
59,236 miles 25th September 2007 – South Coast Performance – Isle of Mann

  • Full Service
  • Front discs
  • Front pads
  • Rear discs
  • Rear Pads

52,771 miles 18th September 2006 – South Coast Performance – Isle of Mann

  • Full Service
  • New clutch
  • Replacement of all front wishbone bushes with poly bushes
  • New catalyst heatshield
  • New window switch
  • New steering rack ball joints
  • New steering rack boots
  • New pollen filters
  • New clutch bearing arm bushes
44,530 miles – 23rd August 2005 – OPC Liverpool

  • Full Service
36,878 miles 27th August 2004 – OPC Lancaster

  • Full Service
30,566 miles 11th September 2003 – OPC Lancaster

  • Full Service
24,990 miles 17th October 2002 Isaac Agnew Porsche, Ireland


  • Full Service and Sale Preparation
20,558 miles 3rd December 2001 Isaac Agnew Porsche, Ireland

  • Full Service
16,858 miles 24th February 2001 Isaac Agnew Porsche, Ireland

  • Full Service and Sale Preparation

Monday, June 18, 2012

Pro Shoot

I was involved in a photo book publication with a photographer looking to collate a publication of 911's through the ages.

His name is John Rampton and he takes superb photos

Some beautiful shots of the car - especially the motion pictures.


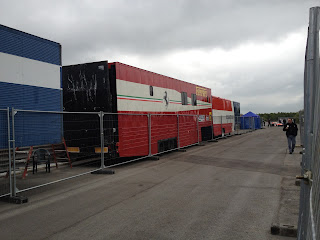
Had a fun day out at an airfield in Surrey, where they happened to be shooting the Ron Howard film 'Rush' about the Hunt / Lauda rivalry. Some fantastic cars there and we saw one of the 'grid start' shots where these beauties raced off the line. Epic noise. Photos taken with my iphone so not the best...


Window / Door Frame Refurb

The black window / door frame surrounds are another 993 weak point. Id go so far as to say most cars that have not had this attended to will have issues by now.

The frame surround is some kind of anodised metal, and is prone to blistering, cracking and general corrosion. I don't think it's a problem, it just doesn't look pretty so I have had both doors stripped and refurbished by Pete at Langley Autocraft (who also did my windscreen surround a few months ago)


Blistered inside of door frame on passenger side


Paint peeling from top of passenger door


Extreme close up of drivers side door (hardly any corrosion on this side, but in for a penny etc etc.....)

The door is stripped, the frames removed, blasted then repainted and reassembled. As usual from Pete, a superb finish.